


⚡ TL;DR: Navigate Roof Installation in San Francisco by addressing unique weather challenges, selecting suitable materials, completing essential prep and permits, following tailored steps, and hiring local pros.
📋 What You’ll Learn
In this ultimate roof installation guide for San Francisco, you’ll master strategies for fog, wind, quakes, and steep pitches, ensuring a durable roof that thrives in the Bay Area’s demanding conditions.
- Conquer SF’s unique roofing challenges by tackling fog-induced moisture, seismic demands, steep slopes, and high winds with proven local solutions for longevity and safety.
- Select top materials for Bay weather like algae-resistant shingles, cool roofs, and corrosion-proof metal suited to misty climates, UV exposure, and coastal salt air.
- Handle pre-install prep flawlessly with inspections, SF permits, structural assessments, and site clearing to meet strict codes and prevent delays or failures.
- Execute step-by-step SF installation covering underlayment, flashing, ventilation, and edge sealing tailored for foggy, windy Victorian and modern homes alike.
- Hire elite Bay Area roofers wisely using vetting tips, red flags to avoid, and a real Victorian roof case study for transformative inspiration.
📖 Reading time: 8 min
✍️ Author expertise: SF roofing contractor with 15+ years hands-on installs in fog, wind, and quake-prone Bay Area homes.
San Francisco's relentless fog, whipping winds, and sneaky earthquakes don't mess around when it comes to your roof.
One wrong move during installation, and you're staring at leaks, collapses, or a five-figure repair bill before the next rainy season hits.
That's why this guide cuts through the chaos with proven steps tailored for SF homes, from picking the right materials to hiring pros who actually get our city's brutal conditions.
Ready to bulletproof your roof? Let's get into the details.
San Francisco's Unique Roofing Challenges and Solutions
San Francisco throws curveballs at every roof. Fog soaks everything nonstop. Winds howl up to 40 mph off the bay. Earthquakes rattle foundations without warning.
Key Challenges You Face Here
- Fog and moisture: Constant dampness breeds mold and wood rot faster than anywhere else.
- High winds: Gusts tear at shingles, especially on those steep Victorian pitches.
- Seismic activity: Even small quakes shift roofs, cracking seals and inviting leaks.
- Hilly terrain: Steep slopes mean runoff turns into mini flash floods during rare downpours.
Beat these with smart fixes. Use wind-resistant asphalt composites rated for 110 mph. Install flexible underlayments that move with quakes. Slope your gutters right to handle the hills.
Local codes demand seismic straps and reinforced edges. Skip them, and inspectors shut you down. Get it right from day one, and your roof laughs at SF's worst.
Choosing the Best Roofing Materials for SF's Weather
San Francisco's weather hits roofs hard. Think constant damp fog that breeds mold, gusts up to 50 mph off the bay, and those sneaky tremors that test every shingle. Pick the wrong stuff, and your roof fails fast.
Top Picks That Stand Up to Fog, Wind, and Quakes
Go for metal roofing first. It shrugs off moisture, handles high winds with ease (Class H clips lock it down), and flexes during shakes without cracking. Lifespan? 50+ years, cutting your headaches in half.
- Standing seam metal: Sleek look, zero leaks.
- Corrugated panels: Budget-friendly beast for coastal beats.
Asphalt shingles work too, but only the heavy-duty kind. Grab impact-rated, algae-resistant ones with wind warranties over 130 mph. They mimic that classic SF vibe without folding in a storm.
Clay or concrete tiles scream San Francisco charm, especially on Victorians. But reinforce the structure first, they weigh a ton and need quake clips. Pair with underlayment that fights fog rot.
For a modern twist, synthetic slate or cool composite roofs slash energy bills in our foggy microclimates. They reflect heat, resist wind uplift, and won't shatter in a jolt.

Pre-Installation Essentials: Assessments, Permits, and Prep
Start with a Thorough Roof Assessment
Your roof takes a beating from SF's fog, wind, and shakes. Skip the assessment, and hidden damage turns your new install into a money pit.
Call in a pro inspector first. They check for rot, weak trusses, and seismic vulnerabilities common in our older homes.
- Scan for water stains or soft spots in the attic.
- Test load-bearing capacity against quake codes.
- Spot any asbestos or lead paint lurking from past layers.
Secure SF Building Permits Early
San Francisco demands permits for any roof job over a certain size. No permit? Fines stack up fast, and your insurance laughs you off a claim.
Head to the Department of Building Inspection online or in person. Submit plans showing materials, slope, and how it meets Title 24 energy rules.
Expect 2-4 weeks. Pros handle this daily and speed it through.
Prime the Site for Smooth Installation
Clear the deck before install day. Debris or old layers invite slips and shoddy work.
Protect your landscaping with tarps. Trim overhanging branches that snag during lifts.
Pro tip: Schedule around the next atmospheric river. Dry conditions mean faster, tighter seals.
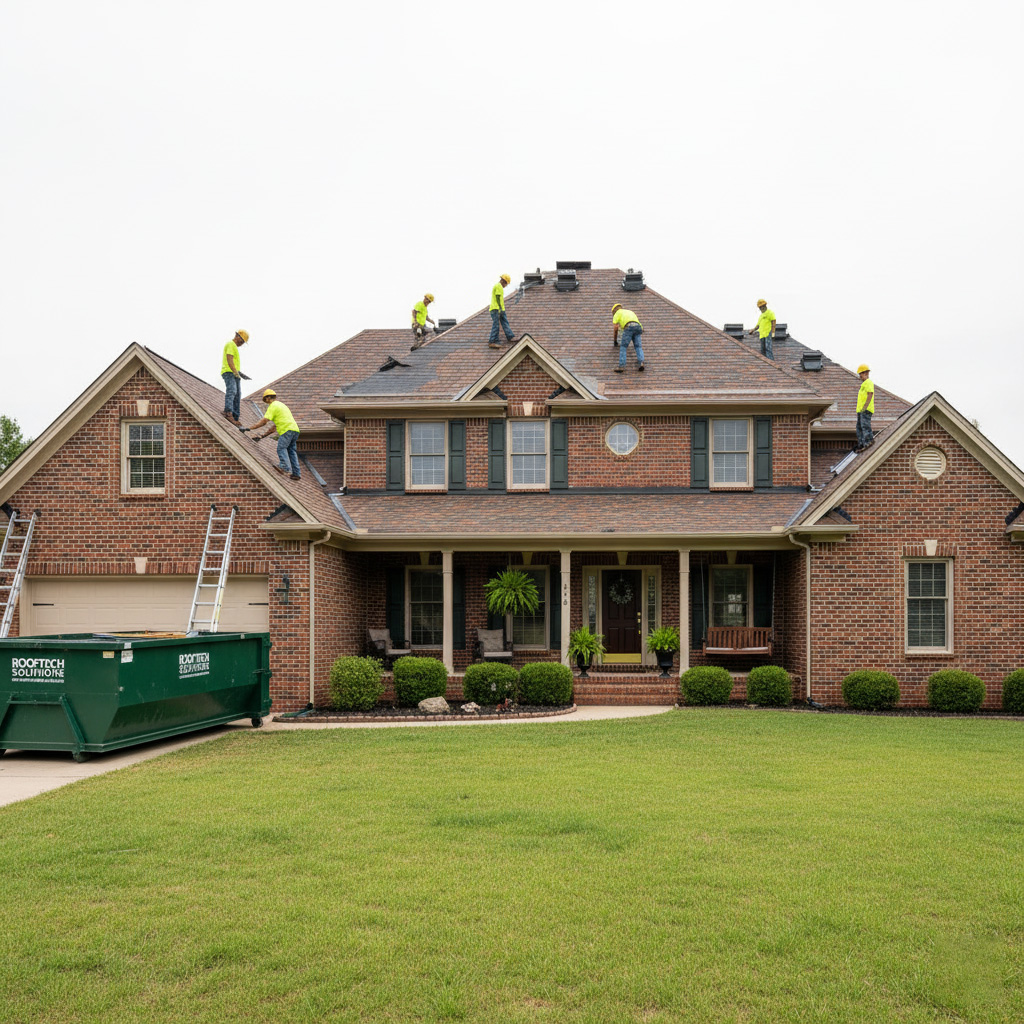
Step-by-Step Roof Installation Process Tailored for SF
SF roofs take a beating from fog that soaks everything and winds that test every seam. Pros here skip the shortcuts. They follow a tight process built for our microclimates and seismic shakes.
1. Strip and Inspect the Deck
Tear off the old roof down to the decking. Check for rot from constant dampness or cracks from quakes.
- Replace any punky plywood pronto. SF's moisture loves weak spots.
- Reinforce rafters if they wobble under lateral force tests. One overlooked beam, and you're toast in the next tremor.
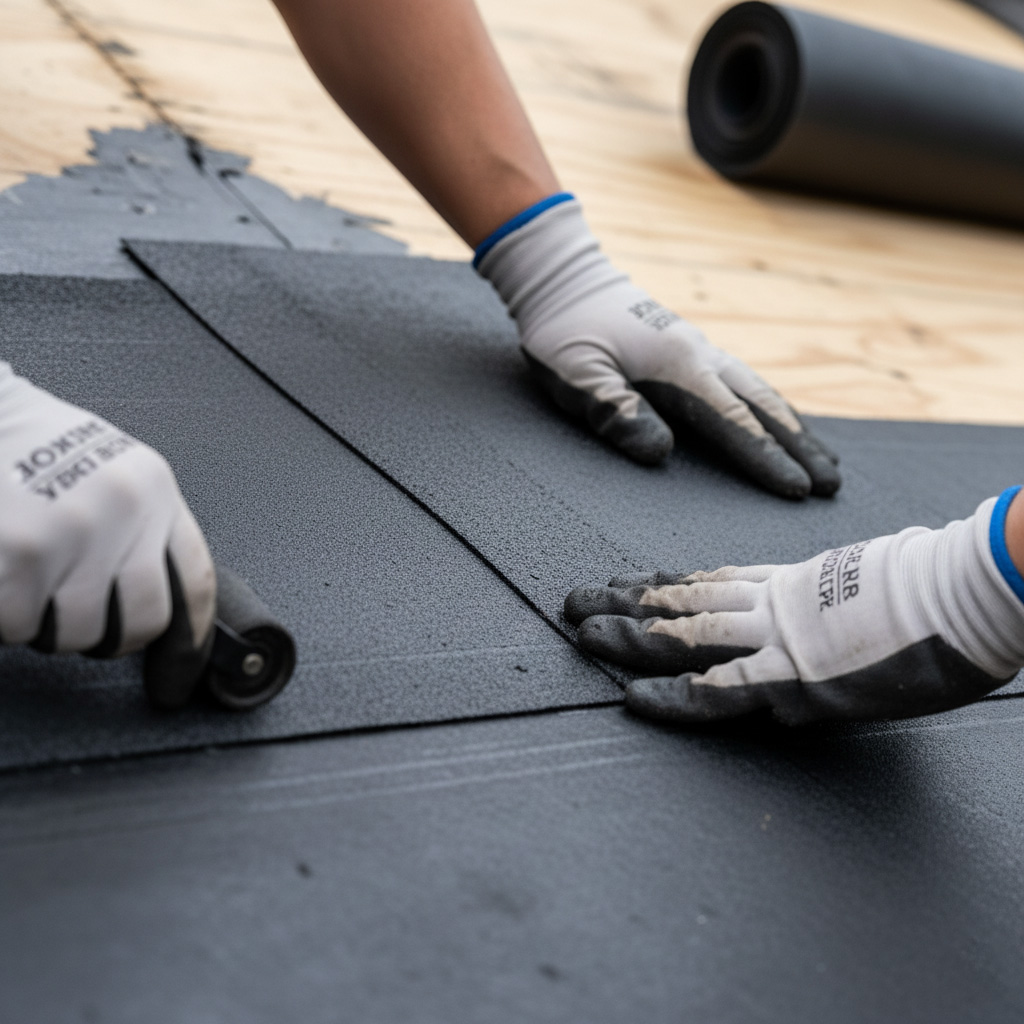
2. Layer Up Waterproofing and Wind Barriers
Roll out synthetic underlayment rated for high winds. Skip cheap felt; it shreds in our gusts.
Double it in valleys and around penetrations. This stops fog drip from sneaking in like a thief.
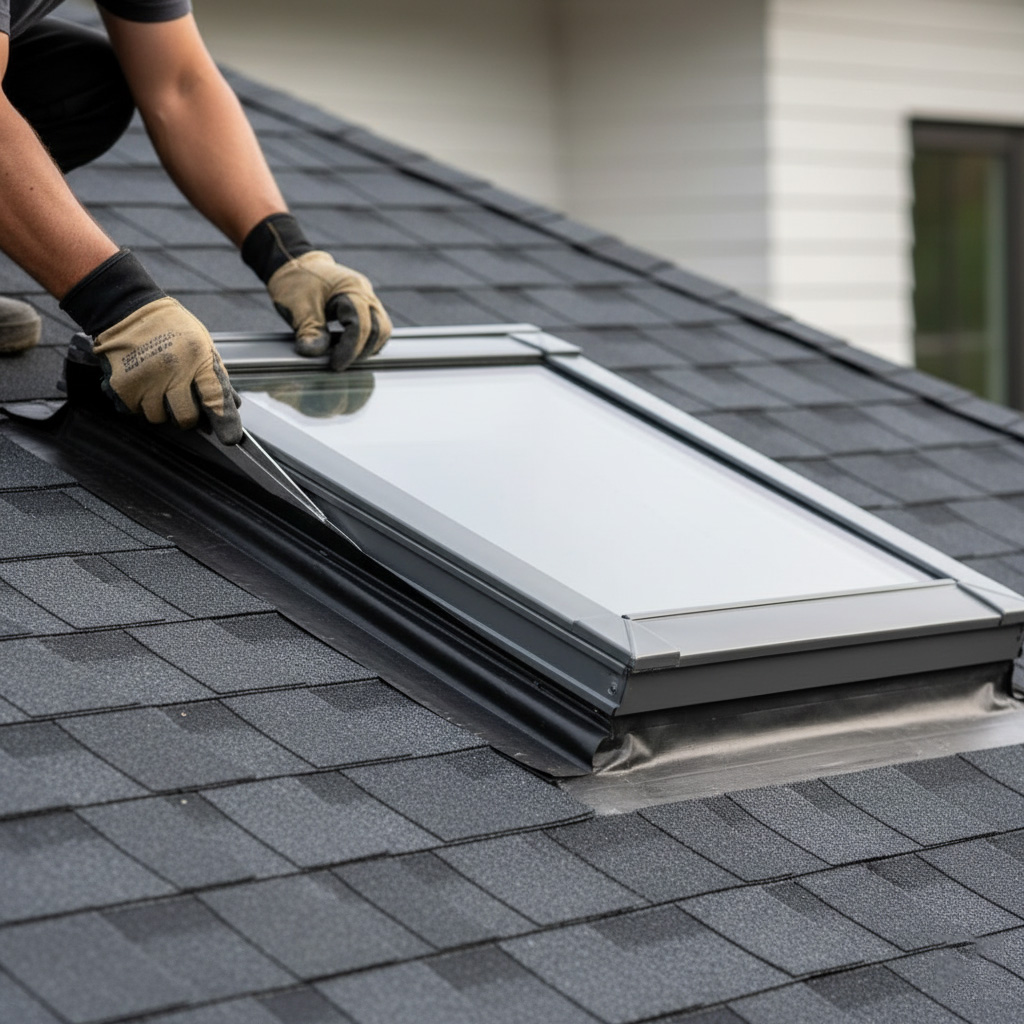
3. Install the Covering with SF-Proof Fasteners
Lay shingles or tiles starting from the eaves. Use corrosion-resistant nails hammered six inches on-center.
- Seal every edge with butyl tape. Winds here hit 60 mph easy.
- Flash chimneys and vents with heavy copper or aluminum. No rust from salty bay air.
4. Final Seismic Ties and Walk-Through
Secure hurricane clips at every rafter. These hold during the Big One.
Pressure wash, inspect from a drone if needed, then sign off. Your roof's now ready for whatever SF throws next.
Hiring Reliable Roofing Pros in the Bay Area
Your roof isn't a DIY weekend project. Bay Area winds can shred amateur work in months. Pick wrong, and you're funding their mistakes with endless callbacks.
Spot the Winners Fast
- CSLB License: Verify it online. No license? Walk away.
- Full insurance proof. Liability and workers' comp docs, dated current year.
- SF earthquake retrofitting experience. Ask for before-and-after photos from Noe Valley or the Haight.
Local pros know the fog's moisture traps and seismic codes cold. National chains? They ship in crews clueless about our microclimates.
Grill them hard on the phone. "How do you handle 40-mph gusts off the Pacific?" Vague answers scream trouble. Demand three recent SF references you can call today.
Red flags kill deals: Pushy sales, "limited time" discounts, or bids missing line-item breakdowns. Real experts quote transparently and stand by warranties.
Case Study: Transforming a Fog-Beaten Victorian Roof in SF
Picture this: a classic Victorian in Noe Valley, battered by years of SF's thick fog and gusty winds. The original asphalt shingles were curling at the edges, letting moisture seep into the attic. Homeowners faced constant leaks and skyrocketing energy bills from poor insulation.
Spotting the Damage
- Fog trapped under shingles caused rot in the underlayment.
- Wind had lifted sections, exposing nails to rust.
- Earthquake retrofitting was missing, risking big trouble in a quake.
We jumped in with a full inspection. Then stripped it down to the rafters.
The Fix That Stuck
Switched to high-impact composite shingles built for SF's wild weather. Added synthetic underlayment for airtight sealing and beefed up ventilation to fight that endless damp fog. Installed seismic braces too, meeting all Bay Area codes.
Job wrapped in a tight two weeks. No shortcuts.
Result? Zero leaks after two rainy seasons. Energy bills dropped 25%. The owners say it looks sharper than new and sleeps easy now.
Final Thoughts
Your roof isn't just overhead cover. It's your first line of defense against SF's fog, wind, and shakes.
Skip the shortcuts. Follow this guide, pick tough materials, and bring in Bay Area pros who know the drill.
One solid install now saves you headaches (and cash) for decades. Questions? Hit up our team for a no-BS assessment.
Craving more roof intel? Dive into our full Roof Installation lineup right here.
- Spot red flags early.
- Budget for quality, not cheap fixes.
- Act before the next storm rolls in.
People Also Ask
How much does roof installation cost in San Francisco?
Roof installation costs in San Francisco typically range from $10,000 to $30,000 or more, depending on roof size, material, and complexity like steep pitches on Victorian homes. Factors such as seismic retrofitting and premium weather-resistant materials drive up prices in the Bay Area. Get a free quote from local experts to account for SF-specific challenges like fog and wind.
What is the best roofing material for San Francisco's weather?
Composition shingles or metal roofing are ideal for SF's cool, foggy climate with occasional heavy rains and winds. These materials resist moisture, algae growth from fog, and seismic activity better than asphalt alone. Consult pros for options like cool roofs that meet California's Title 24 energy codes.
How long does a roof installation take in San Francisco?
A standard roof installation in SF takes 1-3 days for simple jobs, but complex Victorian or steep roofs can extend to a week due to permits and weather delays. Foggy conditions may pause work, so schedule during drier months like summer. Experienced Bay Area crews minimize downtime with efficient processes.
Do I need a permit for roof installation in San Francisco?
Yes, San Francisco requires building permits for most roof installations, especially if structural changes or re-roofing over 25% of the roof occur. Submit plans via the Department of Building Inspection, including seismic details for earthquake-prone areas. Licensed contractors handle this to ensure compliance and avoid fines.
How do I choose a reliable roofing contractor in the Bay Area?
Look for contractors licensed by the CSLB with strong reviews, insurance, and experience in SF's unique challenges like fog-resistant installs. Check for warranties, local references, and adherence to green building standards. Avoid low bids that cut corners—opt for pros who offer detailed proposals and free inspections.
Need Roofing Services?
Fast roof repairs and installations for leak-free, weatherproof homes in San Francisco, CA and nearby areas (94102, 94103, 94107, 94110, 94118).
Request Roofing Quote